Windows 10 comes as free upgrade from Windows 7 and Windows 8/8.1 but also as standalone version that you can purchase online. If you choose option to upgrade your current Windows to Windows 10, it will retain the old operating system and all data, and put everything in so called “Windows.old” folder which will be created on your system partition (usually under C: drive).
Windows.old folder keeps Windows system files, installed programs, each user’s files and settings, etc. This means, if you notice that some files have not been properly copied to the new operating system, you can go to C:\Windows.old folder and find them there. This imposes the fact that your hard drive will be occupied with additional 10-25 GB or much more, just because it keeps the old Windows installation (size varies and depends on how much applications and files you have previously installed/saved on the hard drive).
The idea behind the Windows.old folder is if you are not satisfied with the new Windows 10 experience you can revert to your old Windows, but within an one month time frame. After one month, Windows 10 will automatically wipe out the Windows.old folder without a warning. This is very good feature, because many users are not aware that this folder exists.
However, if you want to delete the Windows.old folder sooner and save a lot of space, the Disk Cleanup tool will help. You can’t remove it like a regular folder in Windows explorer, because Windows considers it as system folder and will show you an error.
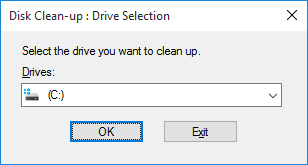
Click the Start button in Windows 10 and type “Disk Clean-up”. After it finds it, press Enter to launch the application. On the Drive Selection prompt press OK.
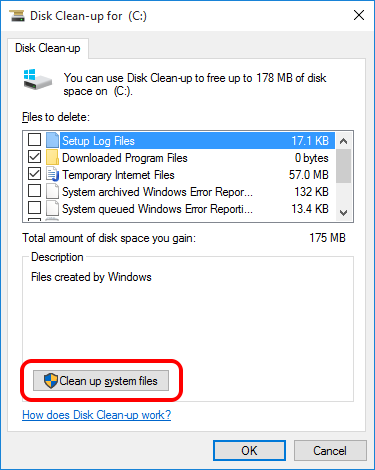
Click “Clean up system files” and confirm again the selection of drive C:
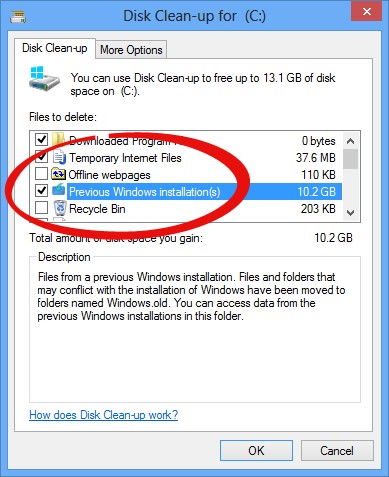
Find “Previous Windows installation(s)” from the list of files to delete and tick the checkbox, then click OK.
On next prompt “Are you sure you want to permanently delete these files” click Delete Files and then YES again.
The clean-up process will take up to several minutes and your C: drive will be freed up from unnecessary files.
