Problem of temporary folders and files that might be forgotten over a long period of time
The inspiration for this article is recent call I’ve received from my friend who asked me for help because the amount of available free space on C:\ drive on his laptop was below 100 MB. He also told me that computer is very slow, but also the Internet browser seems very sluggish.
At first glance I saw that disk space on the system drive is very low and there is enough free space (around 100 GB) on the second partition. I was about to repartition the hard disk, in these terms shrinking D:\ drive and then to increase C:\ drive, when I decided (just in case) to do a final check of all temporary folders in his laptop.
I was surprised when I noticed that in the Temp folder under his profile were accumulated around 16 GB (!) of unnecessary files and folders.
List of necessary steps to check for temporary folders
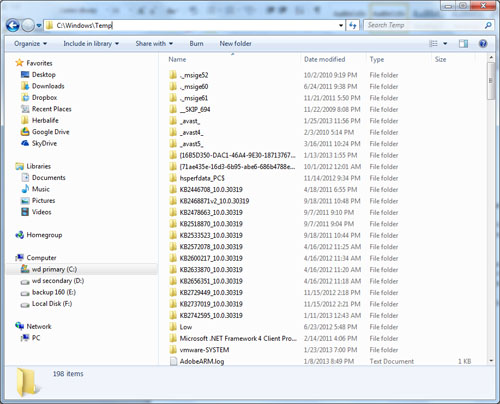
Step 1: Check Windows Temp folder C:\Windows\Temp\ :
Select all folders and files (Ctrl+A) and delete them. You may expect for sure that not all of them will be deleted simply because some of them are being locked by system processes. This is normal.
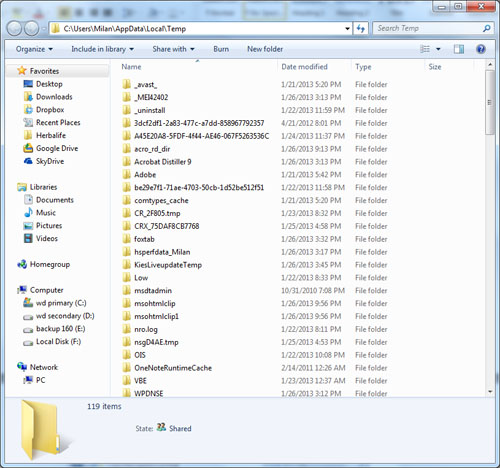
Step 2: Check Temp folder under each user profile:
This is potentially most critical place where all temporary files and folders are being stored.
The path in Windows 7 is C:\Users\%username%\AppData\Local\Temp
The path in Windows XP is C:\Documents and Settings\%username%\Local Settings\Temp
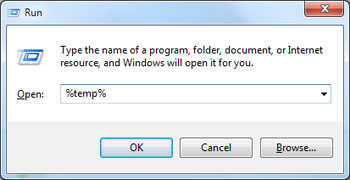
You can open Temp folder by using the Run dialog box. Open Run dialog box from the Start menu or simply press WinLogo+R on the keyboard. Then, type %temp% and press Enter.
Select all files and folders and delete them. You can expect that for some of them deletion will not be possible, mainly for the same reasons: they are locked by the system. But, delete as much as you can. Try once again after restarting the computer.
Step 3: Delete content inside Cache folders associated with each Internet Browser:
For Google Chrome navigate to (just Copy and Paste link in Run dialog box): C:\Users\%username%\AppData\Local\Google\Chrome\User Data\Default\Cache .
This path applies for Windows 7.
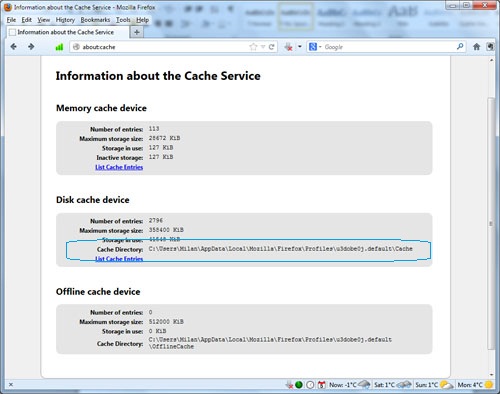
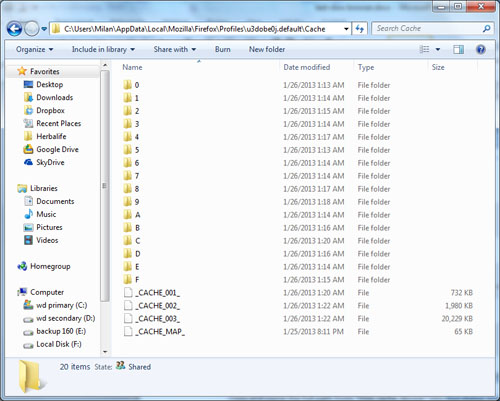
For Mozilla Firefox there is another approach: Open the browser and in the address bar type “about:cache” (without quotes) and press Enter:
The path is C:\Users\%username%\AppData\Local\Mozilla\Firefox\Profiles\u3dobe0j.default\cache where u3dobe0j.default is a random string of 8 characters which represents the Firefox profile (probably this string of characters will be different on your computer).
This path applies for Windows 7.
Copy and paste the full path from “Disk cache device” into the Run dialog box. Select and delete everything you find there.
As for Internet Explorer, copy and paste this code in Run dialog box C:\Users\%username%\AppData\Local\Microsoft\Windows\Temporary Internet Files .
This path applies for Windows 7.
That’s it. This is a kind of manual work, but it is simple and effective.
Keep the number of opened tabs as less as possible
Nowadays we have the possibility to choose between dozens of internet browsers, but most popular are Mozilla Firefox, Google Chrome and Opera.
One of the factors why your browser seems sluggish is the number of open tabs. Each tab takes certain percentage of RAM memory.
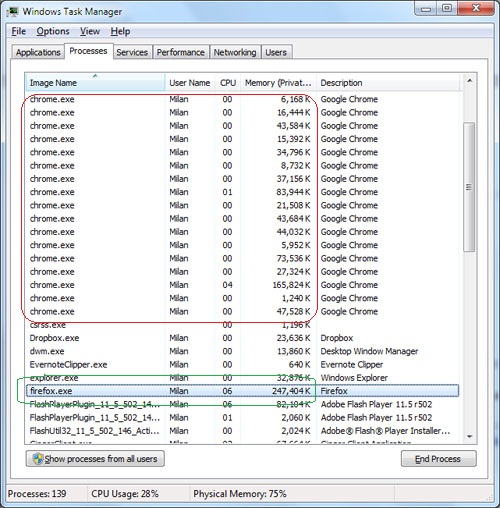
For example, while Firefox is representing all opened tabs for all windows in just one system process, on the other side Chrome and Internet Explorer create a separate process for each tab.
Open Task Manager and take a look how much each of the chrome processes takes memory compared to the Firefox process. In this example, I’ve opened 15 tabs for each browser, cumulatively. Memory consumption is obvious.
Thus, reconsider which Internet browser works best for you and keep the number of tabs as less as possible (of course, if you want to improve surfing experience).


