
I recently had a problem with one specific sender that used to continuously send emails to my business email address. The sender was not actually a real person but a NGO organization with a regular gmail address that was sending me emails totally unrelated to my work. The content of the emails was perfectly regular thus they were not caught by Google’s email filtering service. I politely asked them to stop sending me emails that I have never subscribed to, but with no luck.
Couple of years ago Google was offering a special service, so called “Postini ”– a comprehensive email management and spam blocking software provided free of charge for educational institutions. However, it was revoked and now most of its features are incorporated in the regular Google Apps for Education platform (also free of charge).
I didn’t have another solution except to block email address. My account resides in particular sub-organization and it was easy to configure blocked senders list that will be applied only to that sub-organization.
In Google Apps, it is possible to configure email spam filter for the entire organization or only for concrete sub-organization(s).
If you have a similar problem here is what you need to do:
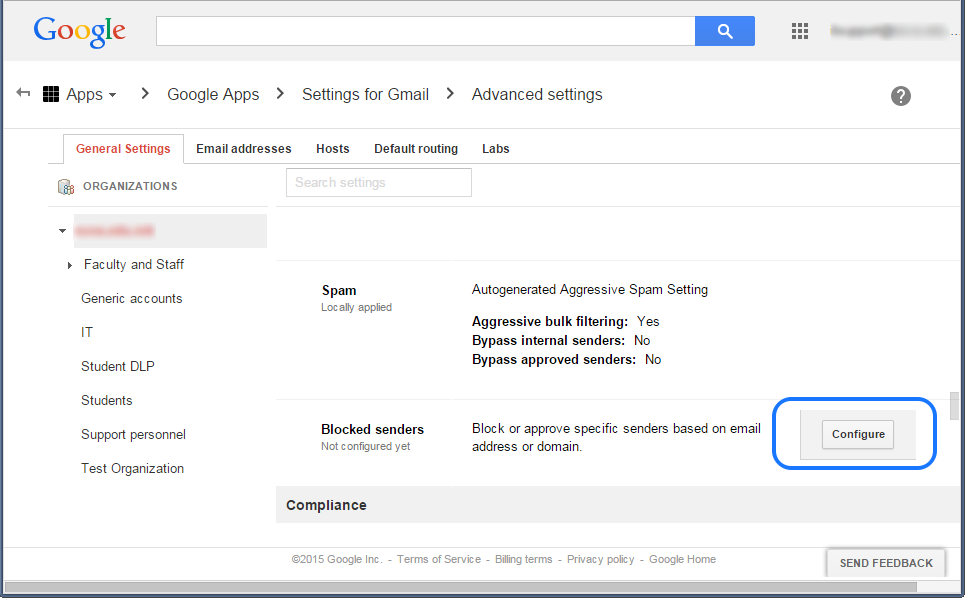
After you sign in, from the Dashboard go to Apps > Google Apps > Gmail, then scroll down and open Advanced settings:
Choose where you are going to create filters by selecting the entire Google Apps organization or only specific sub-organization. Then scroll down to the SPAM section and find the Blocked Senders option. Click the Configure button.
You have couple of options here:
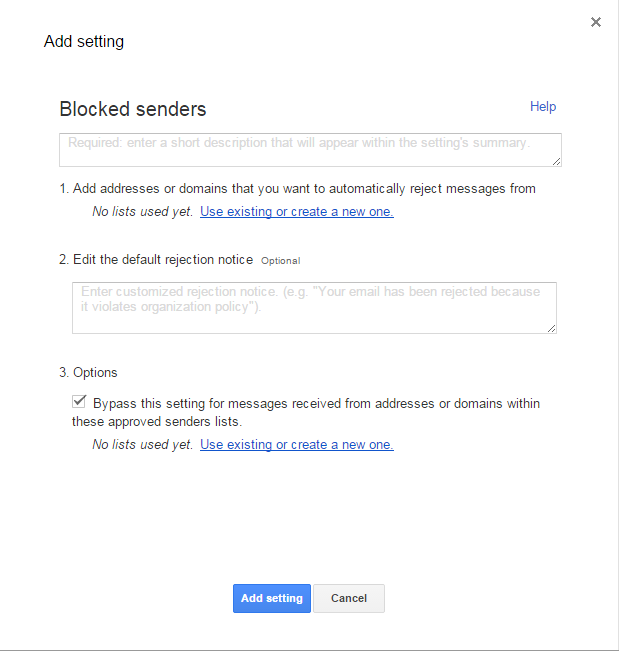
By clicking “Use existing or create new one” you actually start the configuration process of one or more blocked senders’ lists. It is very simple and straight forward process.
Enter a short description and optionally edit the default rejection notice.
At the end, don’t forget to click Add setting (at the bottom of the dialog box) and afterwards Save changes (at the bottom of the General Settings page). It may take up to one hour before the policy propagates to all users in respective sub-organization.
Once you configure these options, with a single click you can easily copy them to other sub-organizations if you need to:

The next time, when an offensive sender tries to send you an email, here is what they will receive back:
Technical details of permanent failure:
Google tried to deliver your message, but it was rejected by the server for the recipient domain yourdomain.edu by aspmx.l.google.com. [2607:f8b0:400e:c04::1b].The error that the other server returned was:
550-5.7.1 The user or domain that you are sending to (or from) has a policy that
550-5.7.1 prohibited the mail that you sent. Please contact your domain
550-5.7.1 administrator for further details. For more information, please visit
550 5.7.1 http://support.google.com/a/bin/answer.py?answer=172179 a3si13783016pdo.25 – gsmtp