Update 2/11/15: The MailChimp add-on for Gmail has been decommissioned and this guide is not more relevant.
Do you often need to send the same email message to lots of different people? If so, then you will certainly consent that it should be personalized and look unique to every recipient. If we are talking about sending personalized message to less than ten people, it is not a problem to do that one by one. However, imagine sending the message individually to one hundred or even more recipients? It is not productive, yet a time consuming process.
What we need in this situation is a tool that can do email merge. This problem is addressed by “Merge by MailChimp” – powerful Gmail add-on that brought mail merge to email.
This add-on makes it easy for individuals, businesses and schools who use Google Apps platform to create and send personalized email right from a Google Document.
This article focuses on the following key points:
1. How to enable Gmail mail merge?
2. How does MailChimp work?
3. What are the MailChimp’s options and configuration?
4. MailChimp analytics
5. MailChimp Add-on limitations
Let us begin.
How to enable gmail mail merge
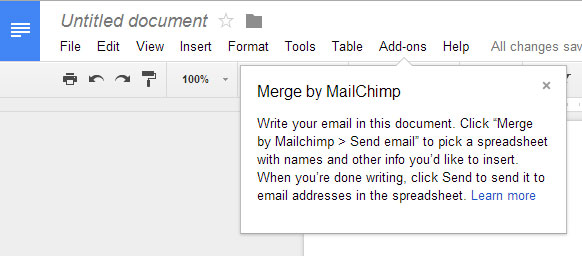
Simply, open this link from your preferred Internet browser and install the MailChimp Add-on. After authorizing the app to use the required information from your Google account, it will be installed. Then return to your opened Google Doc, where you will see the following notification:
How does it work?
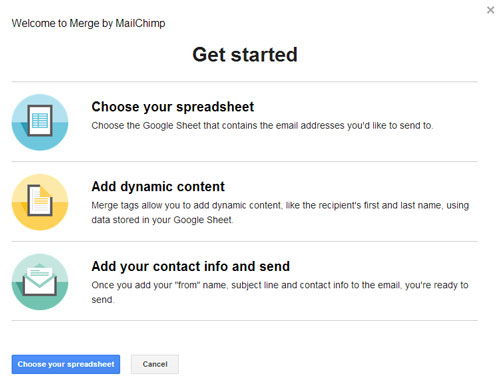
In a nutshell, you write the email message in a Google Doc and you need email addresses stored in Google Spreadsheet. When you are done, From the Add-ons menu you click Merge by MailChimp > Send email. It asks you to locate the spreadsheet we mentioned a while ago. From the available columns, you pick which ones you will populate dynamic content from. After adding the basic contact information, it sends the email to each address separately.
MailChimp options and configuration
I chose spreadsheet where I have previously collected email addresses. Two of them are real, whereas one is fake. After selecting the spreadsheet, all the spreadsheet data has been fetched in the special MailChimp sidebar on the right.

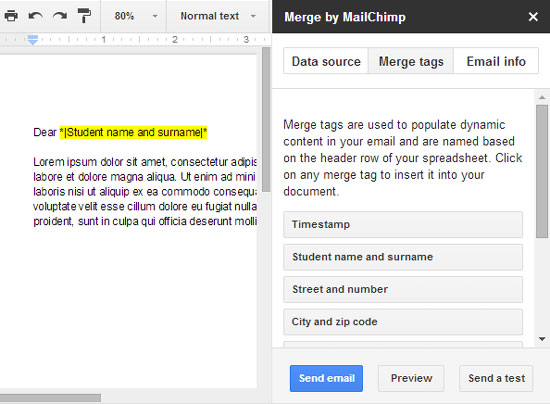
The first tab is Data Source, which includes the following details: the spreadsheet being in use, which worksheet to look in, the range of rows to be considered in the merge and of course, the column which contains the email addresses.
The second tab Merge tags actually contains all “variables” that populate dynamic content in the email. Place the mouse cursor on the specific place in your document and then click the corresponding merge tag. For example, if we talk about the beginning of the document, we will place salutation followed by the name of the recipient, as following:
Dear *|Name and Surname|*
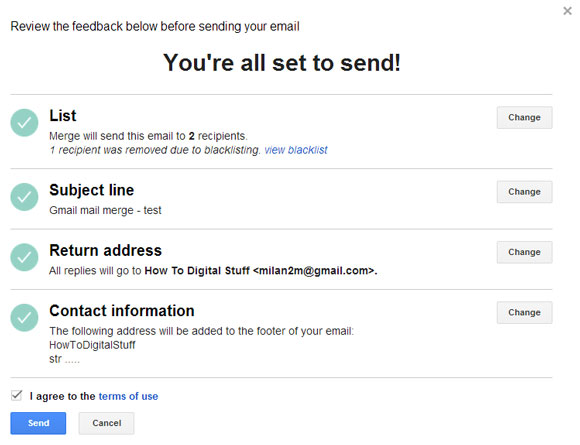
The third tab is Email info and it is about filling out the basic information of the sender: From name, email address, Email subject line, Permission reminder (for example how you have collected their email address), and Sender’s contact information. Since MailChimp is a platform for bulk email sending, they must comply with international spam law, thus providing basic information of the sender to the recipient.
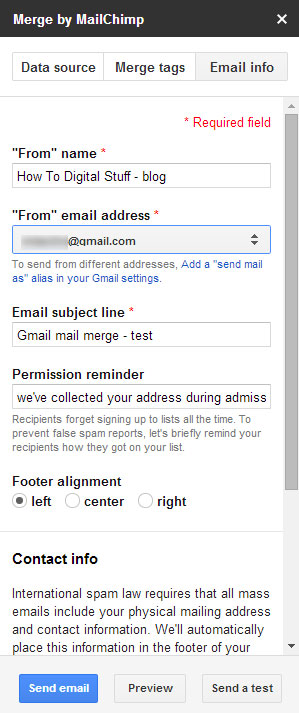
To ensure that everything is set as required, use the Preview option at the bottom. See the names, check whether the position of the merge tags is appropriate, do a spell check of the sender personal information such as phone numbers, street address and so on.
You can even send a test email to yourself to see how it works, before sending an official email.
MailChimp Analytics
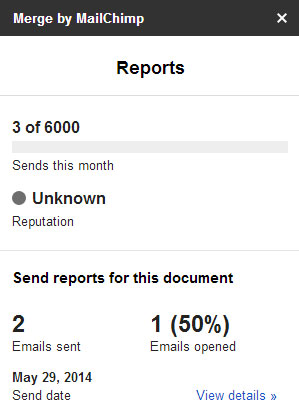
This add-on also provides simple, yet useful analytics about sent emails. It shows the exact number and percentage of delivered, opened and bounced email messages. Go to Add-ons > Merge by MailChimp > click View Reports.
Blacklists feature is also taken in consideration. If you send an email message to someone and they do not want to hear from you anymore, there is an unsubscribe option. Once they unsubscribe, the MailChimp maintains a list of all unsubscribed addresses. Click the Send email button and then “export blacklist” hyperlink.
MailChimp Add-on Limitations
MailChimp add-on is designed with constraints of sending emails to small groups of maximum 1000 people, with monthly cycle of 6000. If you need to send larger volume of emails, read more on their official website MailChimp.com.
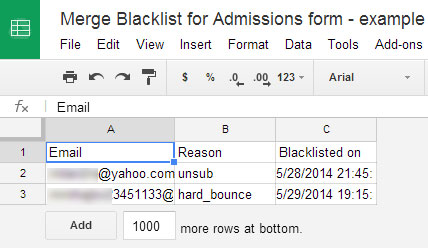
On the other side, if the recipient unsubscribes by mistake, I didn’t find a way how to include them again in the email distribution, although their addresses remain in the spreadsheet. Even if you manually delete the email address from the blacklist spreadsheet, it is not possible to send them an email. It seems that MailChimp Add-on has some secret place where it keeps read-only archive of all unsubscribed emails.
Is there an alternative now that Merge is no longer available?
Thanks
As it is stated in the update from 2/11/15 https://blog.mailchimp.com/introducing-merge-by-mailchimp/ – “Merge has been removed from the Google Drive add-ons store and is not being actively developed at this time. We’ll update this post if there are any changes to its status.”
If I find different solution for doing merge, I will write an article.